If you are using a MacOS and you are planning to do a X-forwarding, you may notice an error like this. In the Pix, below, after SSH, I wanted to X-forward Firefox Browser from Rocky Linux 8
ssh -X user1@192.168.0.1
There are a few settings we need to do. Let’s fix the “Locale not supported by C library. Using the fallback ‘C’ locale”
Issue 1 – Locale not support by C library. Using the fallback ‘C’ locale
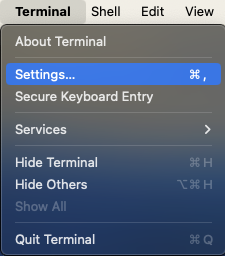
To fix it, go to Top-Left-Hand Corner of your Mac-Desktop to look for the Terminal App,
Click “Settings” (Pix 1)
Click the Profiles Icons (Pix 2)
Uncheck the “Set locale environment variable on startup” (Pix 2)
Close and Quit Terminal App and come in again. You should fix the first problem.
Issue 2 – Install XQuartz
X11 used to be included with macOS. Apple no longer includes X11 with macOS. That is why you see an error like this “Error: no DISPLAY environment variable specified.”
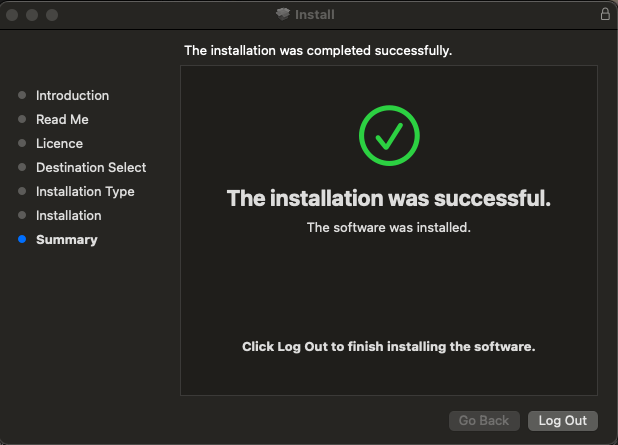
You have to download the XQuartz App which is an open-source effort to develop a version of the X.Org X Window System that runs on macOS. Downloading and Installing is very straight-forward and easy. I’ve captured selected screen-shots….
After installing, you may want to let is run in the background
Log-Off from Your Mac Completely to allow the settings to reinitate
When attempting to log in with a user that requires MFA the following error is presented:
$ ssh user@192.168.0.1
SSL Connection Error
Cause:
The error is likely due to a certificate problem. A required certificate may be missing or the permission may not be set correctly
How to check:
# /usr/share/centrifydc/bin/adcdiag
VERSION   : Verify that DirectControl version supports MFA               : Pass
JOINSTATE : Verify that DirectControl is in connected mode               : Pass
ZONECHK   : Verify that MFA is supported in the zone                     : Pass
SSHDCFG   : Verify that SSHD enables ChallengeResponseAuthentication     : Warning
          : Cannot read sshd configuration file. Probably you are not
          : using Delinea openssh. SSH login for MFA users will fail if
          : option ChallengeResponseAuthentication is not set to yes.
          : Please check and ensure ChallengeResponseAuthentication is
          : set to yes in sshd configuration file.
CDCCFG    : Verify that MFA options in centrifydc.conf are correct       : Pass
PROXYCFG  : Verify that HTTP proxy configuration is set properly         : Pass
CLDINST   : Verify that trusted Identity Platform instance is specified  : Pass
          : Successfully connected to Identity Platform and certificate
          : has been verified OK.
CNTRCFG   : Verify that Connectors are configured correctly              : Pass
CURCNTR   : Verify that DirectControl has selected a workable Connector  : Pass
CLOUDROLE : Verify that this machine has permissions to perform Identity
          : Platform authentication                                      : Pass
......
......
......
Check the Logs at /var/centrify/tmp…. You may notice some errors like
.....
.....
ERROR:
Not a trusted connector or no valid connector certificate installed locally.
SUGGESTIONS:
1. Verify that the IWA root CA certificate is installed in the system. Please refer to KB-7393 on how to configure the root CA certificate in the system.
2. Please collect connector log if you need Delinea support.
.....
.....
Resolution:
Check whether the Certificates have been added at
/etc/pki/ca-trust/source/anchors/
/var/centrify/net/certs
Check the SSH Settings at
# vim /etc/ssh/sshd_config
# To disable tunneled clear text passwords, change to no here!
#PasswordAuthentication yes
#PermitEmptyPasswords no
PasswordAuthentication no


# Change to no to disable s/key passwords
#ChallengeResponseAuthentication yes
ChallengeResponseAuthentication yes
If you are having SSH issues and if you turned on high verbosity and the following output is generated
# ssh -vvv XXX.XXX.XXX.XXX
.....
.....
debug1: Offering public key: debug3: send packet: type 50
debug2: we sent a publickey packet, wait for reply
debug3: receive packet: type 51
.....
.....
debug2: we did not send a packet, disable method
debug1: No more authentication methods to try.
user1@192.168.0.1: Permission denied (publickey,gssapi-with-mic,password)
According to SSH protocol (RFC 4252), these are the general authentication message codes
Type 2: Incorrect Configuration Settings on the /etc/ssh/sshd_config (Assuming you are using Password Authentication) Inside /etc/ssh/sshd_config, you should have something like
PermitRootLogin no
.....
PasswordAuthentication yes
.....
ChallengeResponseAuthentication no
.....
GSSAPIAuthentication yes
GSSAPICleanupCredentials no
.....
UsePAM yes
Type 2: Incorrect Configuration Settings on the /etc/ssh/ssh_config In Rocky Linux 8, everything should be commented except the last line “Include /etc/ssh/ssh_config.d/*.conf”
As mentioned, in the blog entry, Terrapin Attack (CVE-2023-48795): SSH Protocol Impacted, the attack is possible only if you use vulnerable ciphers and encryption modes: ChaCha20-Poly1305, CTR-EtM, CBC-EtM. Note that the cyphers and the encryption modes themselves are not vulnerable, but their input (sequence number) can be manipulated by the attacker.
Unable to negotiate with 172.21.33.11 port 22: no matching cipher found. Their offer: aes256-gcm@openssh.com,aes128-gcm@openssh.com,aes256-ctr,aes192-ctr,aes128-ctr
To verify that the Terrapin Attack Vulnerability is mitigated, take a look at Vulnerability Scanner. Pre-built binaries for all major platforms and the source code are available on GitHub.
Researchers from Ruhr University announced the discovery of new vulnerabilities impacting the SSH Protocol. Detailed Information of the Terrapin Attack can be found at Terrapin Attack.
Terrapin is a man-in-the-middle attack; the flaw allows an attacker to corrupt data being transmitted. This can result in a loss of information or bypass critical security controls such as keystroke timing protections or SHA-2 cryptographic hash requirements, allowing the threat actor to downgrade to SHA-1. Doing so opens up the possibility of other attacks on downstream applications, components, or environments that use SSH. These associated vulnerabilities have been assigned CVE-2023-46445 (Rogue Extension Negotiation Attack in AsyncSSH) and CVE-2023-46446 (Rogue Session Attack in AsyncSSH).
The attack is possible only if you use vulnerable ciphers and encryption modes: ChaCha20-Poly1305, CTR-EtM, CBC-EtM. Note that the cyphers and the encryption modes themselves are not vulnerable, but their input (sequence number) can be manipulated by the attacker.
How do I mitigate the attack?
To mitigate the attack, either you upgrade OpenSSH to their latest version 9.6 or disable the affected ciphers and encryption modes.
Limited Impacts: Terrapin can delete consecutive portions of encrypted messages, which in isolation will typically result in a stuck connection. Some of the most serious impacts identified are in downstream applications implementing SSH, such as AsyncSSH. An attacker may be able to disable certain keylogging obfuscation features, enabling them to conduct a keylogging attack; or, worst case, a threat actor can sign a victim’s client into another account without the victim noticing, enabling phishing attacks.
Difficult to Expliot: An active man-in-the-middle attacker and specific encryption modes are prerequisites for the exploit. Intercepting SSH traffic requires a detailed understanding of a target’s environment, limiting real-world applicability.
How do I check?
You may want to explore the vulnerablilty tool published by the Ruhr University Researchers:
For more information, do take look at Vulnerability Scanner. Pre-built binaries for all major platforms and the source code are available on GitHub.
Usage is very simple, after downloading the relevant binary, just use the command
After making changes to the configuration file, you may want to do a sanity check on the configuration file
# sshd -t
Restart sshd services
# systemctl restart sshd
To test if weak CBC Ciphers are enabled
$ ssh -vv -oCiphers=3des-cbc,aes128-cbc,aes192-cbc,aes256-cbc [youruserid@IP of your Server]
You should receive a aimilar message message
Unable to negotiate with 172.21.33.13 port 22: no matching cipher found. Their offer: chacha20-poly1305@openssh.com,aes256-gcm@openssh.com,aes128-gcm@openssh.com,aes256-ctr,aes192-ctr,aes128-ctr
If you encountered issues like “Permission denied, please try again.” during SSH, there are a few steps to consider.
One possibility is that you may want to took at /var/log/secure which might give some clues to the possible causes. One could be due to lock out rules for SSH. There is one interesting writeup which could shed light into this possibility. Configure lockout rules for SSH login
Another possibility is that you may want to check on the permission on your .ssh directory which may be incorrectly set. For example, you may want to consider