If you are using a MacOS and you are planning to do a X-forwarding, you may notice an error like this. In the Pix, below, after SSH, I wanted to X-forward Firefox Browser from Rocky Linux 8
ssh -X user1@192.168.0.1
There are a few settings we need to do. Let’s fix the “Locale not supported by C library. Using the fallback ‘C’ locale”
Issue 1 – Locale not support by C library. Using the fallback ‘C’ locale
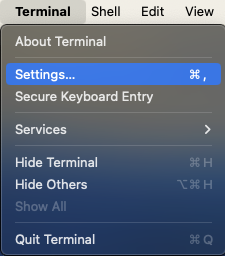
To fix it, go to Top-Left-Hand Corner of your Mac-Desktop to look for the Terminal App,
Click “Settings” (Pix 1)
Click the Profiles Icons (Pix 2)
Uncheck the “Set locale environment variable on startup” (Pix 2)
Close and Quit Terminal App and come in again. You should fix the first problem.
Issue 2 – Install XQuartz
X11 used to be included with macOS. Apple no longer includes X11 with macOS. That is why you see an error like this “Error: no DISPLAY environment variable specified.”
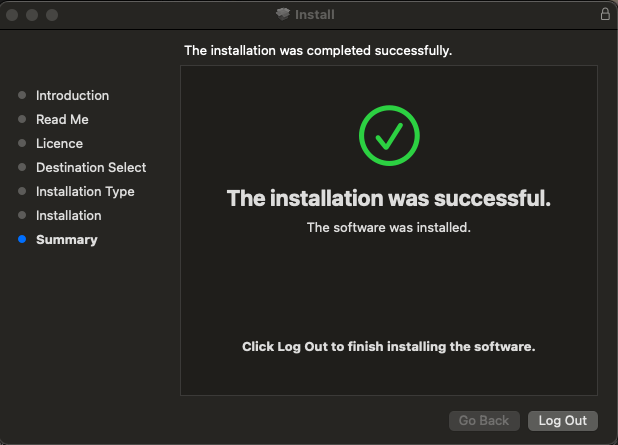
You have to download the XQuartz App which is an open-source effort to develop a version of the X.Org X Window System that runs on macOS. Downloading and Installing is very straight-forward and easy. I’ve captured selected screen-shots….
After installing, you may want to let is run in the background
Log-Off from Your Mac Completely to allow the settings to reinitate
If you are having SSH issues and if you turned on high verbosity and the following output is generated
# ssh -vvv XXX.XXX.XXX.XXX
.....
.....
debug1: Offering public key: debug3: send packet: type 50
debug2: we sent a publickey packet, wait for reply
debug3: receive packet: type 51
.....
.....
debug2: we did not send a packet, disable method
debug1: No more authentication methods to try.
user1@192.168.0.1: Permission denied (publickey,gssapi-with-mic,password)
According to SSH protocol (RFC 4252), these are the general authentication message codes
Type 2: Incorrect Configuration Settings on the /etc/ssh/sshd_config (Assuming you are using Password Authentication) Inside /etc/ssh/sshd_config, you should have something like
PermitRootLogin no
.....
PasswordAuthentication yes
.....
ChallengeResponseAuthentication no
.....
GSSAPIAuthentication yes
GSSAPICleanupCredentials no
.....
UsePAM yes
Type 2: Incorrect Configuration Settings on the /etc/ssh/ssh_config In Rocky Linux 8, everything should be commented except the last line “Include /etc/ssh/ssh_config.d/*.conf”
If you encountered issues like “Permission denied, please try again.” during SSH, there are a few steps to consider.
One possibility is that you may want to took at /var/log/secure which might give some clues to the possible causes. One could be due to lock out rules for SSH. There is one interesting writeup which could shed light into this possibility. Configure lockout rules for SSH login
Another possibility is that you may want to check on the permission on your .ssh directory which may be incorrectly set. For example, you may want to consider
To secure your system better by allowing selected hosts to ssh into your system as root, you will need the Match keyword found in the /etc/ssh/sshd_config
For example, to allow only 192.168.x to be able to ssh into the system, you do the following. If you are using
Edit the SSH Config
% vim /etc/ssh/sshd_config
1. By IP Addresses
PermitRootLogin no
.....
.....
# Example of overriding settings on a per-user basis
Match Address 192.168.*,172.21.1.1
PermitRootlogin yes
2. By Host Name
PermitRootLogin no
UseDNS yes
.....
.....
# Example of overriding settings on a per-user basis
Match Host *.example.com,host1.idontknow.com
PermitRootlogin yes
3. By User and IP Addresses
PermitRootLogin no
UseDNS yes
.....
.....
# Example of overriding settings on a per-user basis
Match User user1 Host *.example.com
PermitRootlogin yes
I encountered this error recently when trying to X forward to another remote site.
"Warning: No xauth data; using fake authentication data for X11 forwarding."
and there was no and doesn’t display picture.
These are the steps I took to trouble-shoot
I checked my /etc/ssh/sshd_config and noted that the I have “X11Forwarding yes”
On my .ssh/config, I have the “ForwardX11 yes”
But one of my parameter /etc/ssh/sshd_config “X11Uselocalhost yes”. Apparently,I was able to X11 Forward for hosts specify in my /etc/hosts file, but those outside my host file, I was not able to display the picture.
But once I modified the “X11Uselocalhost no”, the issue was resolved.
When doing X forwarding, sshd listens on a TCP socket for connections from X clients. Normally, it will accept connections addressed to the loopback address only (127.0.0.1), restricting it to clients on the local host. X11UseLocalhost no means it will accept connections from anywhere.
*If you are still using “Could not open a connection to your authentication agent.”
# exec ssh-agent bash
*If You are having the issue. The default is
@@@@@@@@@@@@@@@@@@@@@@@@@@@@@@@@@@@@@@@@@@@@@@@@@@@@@@@@@@@
@ WARNING: UNPROTECTED PRIVATE KEY FILE! @
@@@@@@@@@@@@@@@@@@@@@@@@@@@@@@@@@@@@@@@@@@@@@@@@@@@@@@@@@@@
Permissions 0644 for 'id_rsa.pub' are too open.
It is required that your private key files are NOT accessible by others.
This private key will be ignored.