
References
Author: kittycool only
Compiling Singularity-CE-3.9.2 on CentOS-7
The Official Documentation can be found at https://sylabs.io/guides/3.0/user-guide/installation.html
Prerequisites 1 – Yum
If you are using CentOS, you may want to put the necessary libraries and dependencies in first.
yum install -y && \
yum groupinstall -y 'Development Tools' && \
yum install -y \
openssl-devel \
libuuid-devel \
libseccomp-devel \
wget \
squashfs-tools
Prerequisites 2 – Go
Go to the Download Page https://go.dev/dl/ to download the Linux Version.
Extract the archive you downloaded into /usr/local, creating a Go tree in /usr/local/go.
This step below will remove a previous installation at /usr/local/go, if any, prior to extracting. Please back up any data before proceeding.
% rm -rf /usr/local/go && tar -C /usr/local -xzf go1.17.5.linux-amd64.tar.gzAdd /usr/local/go/bin to the PATH environment variable. You can do this by adding the following line to your $HOME/.profile or /etc/profile (for a system-wide installation):
export PATH=$PATH:/usr/local/go/binVerify the Installation with the command
% go versionCompiling Singularity
To download Singularity, do visit the download site. Singularity uses a build system called makeit. mconfig is called to generate Makefile and them make is used to compile and install
% cd singularity
% ./mconfig
 --prefix=/usr/local/singularity-ce-3.9.2
% cd build
% make
% make install
Source bash-completion file
To enjoy bash completion with Singularity commands and options, source the bash-completion file. you need to source the appropriate file and add it to the bash-completion directory in /etc so that it will be sourced automatically when you start another shell.
% . /usr/local/singularity-ce-3.9.2/etc/bash_completion.d/singularity
% cp /usr/local/singularity-ce-3.9.2/etc/bash_completion.d/singularity /etc/bash_completion.d/
Testing
As long as you see a cow your installation is working properly…….
singularity run library://godlovedc/funny/lolcow/ Q: What is the difference between a \
\ duck? A: One leg is both the same. /
-------------------------------------
\ ^__^
\ (oo)\_______
(__)\ )\/\
||----w |
|| ||
References
Working around Docker’s download limit on RedHat OpenShift
Taken from “How to work around Docker’s new download rate limit on Red Hat OpenShift” from RedHat Developer.
Docker recently changed its policy for downloading images as an anonymous user. The company now has a limit of 100 downloads every six hours from a single IP address.
If you are using the OpenShift Developer Sandbox to experiment with a free OpenShift cluster, you might encounter the error message shown in Figure 1.
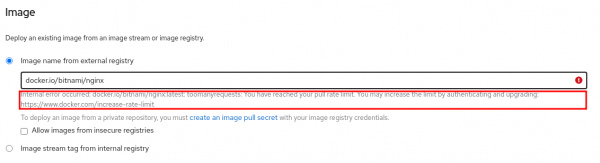
All you have to do to avoid Docker’s new rate-limit error is authenticate to your Docker Hub account. After you’ve authenticated to the account, you won’t be pulling the image as an anonymous user but as an authenticated user. The image download will count against your personal limit of 200 downloads per six hours instead of the 100 downloads shared across all anonymous cluster users.
For the complete article, do take a look at “How to work around Docker’s new download rate limit on Red Hat OpenShift” from RedHat Developer.
How to activate your no-cost RHEL subscription
This article is taken from RedHat Developer How to activate your no-cost Red Hat Enterprise Linux subscription. 3 Simple Steps were described in the article.
- Step 1: Make sure you have a Red Hat account
- Step 2: Download no-cost RHEL
- Step 3: Register your RHEL subscription
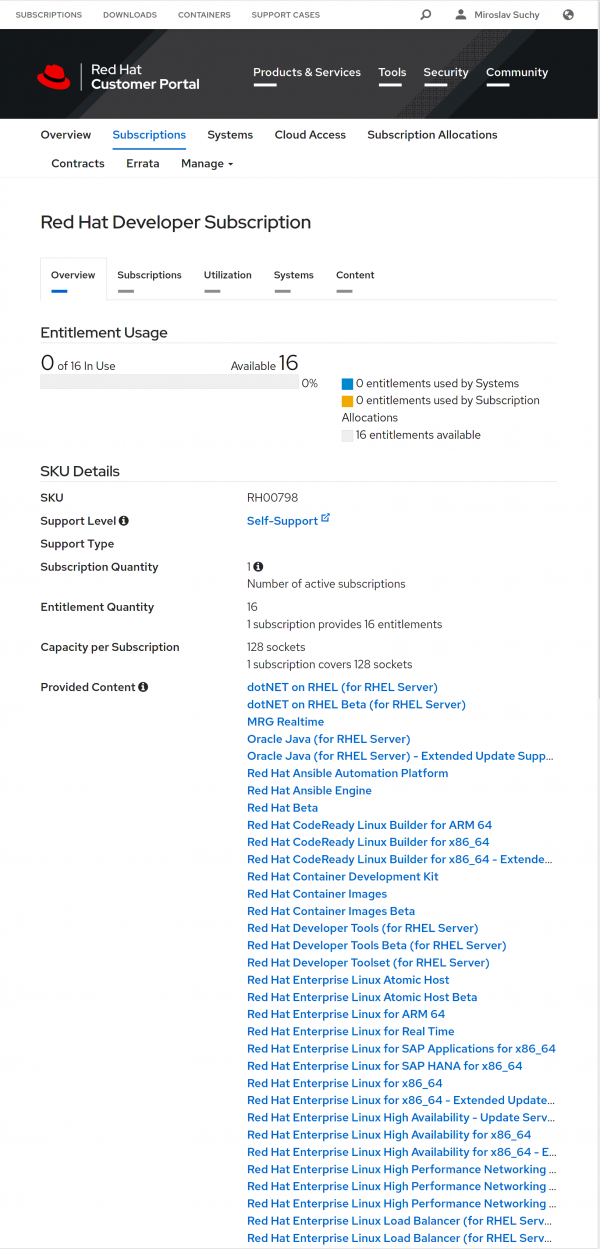
As Developer, you have up to 16 subscription free-of-charge
Starting and Stopping CentrifyDA Agent
If the agent is not running, run the following command to start it:
/usr/share/centrifydc/bin/centrifyda startTo stop the agent,
/usr/share/centrifydc/bin/centrifyda stopReferences:
How to uninstall Centrify agent on Unix/Linux platforms?
As root or sudo, open a terminal and navigate to the folder where Centrify was first installed (typically /usr/share/centrifydc/bin) . On most Centrify DirectControl-managed systems, you can remove the Centrify DirectControl Agent and related files by running the uninstall.sh script.
as follows:
/bin/sh /usr/share/centrifydc/bin/uninstall.shFor example:
Do you want to uninstall the CentrifyDC-5.8.1 package from this computer? (Q|Y|N) [N]:N
References
KB-1780: How to uninstall Centrify agent on Unix/Linux platforms?
Resolving r.Java is not found (attached, “rJavaError”) on R-4.1.0
If you are installing rJava in R and you encountered this issue during install
% R
> install.packages("rJava")
checking whether setjmp.h is POSIX.1 compatible... yes
checking whether sigsetjmp is declared... yes
checking whether siglongjmp is declared... yes
checking Java support in R... present:
interpreter : '/usr/bin/java'
archiver : ''
compiler : ''
header prep.: ''
cpp flags : ''
java libs : ''
configure: error: Java Development Kit (JDK) is missing or not registered in R
Make sure R is configured with full Java support (including JDK). Run
R CMD javareconf
as root to add Java support to R.
If you don't have root privileges, run
R CMD javareconf -e
to set all Java-related variables and then install rJava.
ERROR: configuration failed for package ‘rJava’
* removing ‘/usr/local/R-4.1.0/lib64/R/library/rJava’
The downloaded source packages are in
‘/tmp/RtmpnllvN9/downloaded_packages’
Updating HTML index of packages in '.Library'
Making 'packages.html' ... done
Warning message:
In install.packages("rJava") :
installation of package ‘rJava’ had non-zero exit status
> install.packages("javareconf")
Warning message:
package ‘javareconf’ is not available for this version of R
The Issue is to fix the missing Java Support to R. You can download the Java version you required https://www.oracle.com/java/technologies/downloads/archive/ I chose version 11. I used the “Linux x64 Compressed Archive”. Installation was a breeze as it is just unpacking and java can be used immediately. But it is important to make sure the environment is fixed. For example,
export JAVA_HOME=/usr/local/jdk-11.0.12
export PATH=$PATH:/usr/local/jdk-11.0.12/bin
export LD_LIBRARY_PATH=$LD_LIBRARY_PATH:/usr/local/jdk-11.0.12/lib
export MANPATH=$MANPATH:/usr/local/jdk-11.0.12/share
Now you can run R. At the command prompt, type install.packages(“rJava”)
% R
> install.packages("rJava")
> library("rJava")
References:
What is Digital Twin?
This article is taken from What is a digital twin? A real-time, virtual representation
Digital twins are real-time, virtual representations of objects, processes, and systems. While digital twins can represent purely digital things, they most frequently serve as a bridge between the physical and digital domains. For example, a digital twin could provide a digital view of the operations of a factory, communications network, or the flow of packages through a logistics system.
What is a digital twin? A real-time, virtual representation
“The implementation of a digital twin is an encapsulated software object or model that mirrors a unique physical object, process, organization, person, or other abstraction,” according to Gartner. “Data from multiple digital twins can be aggregated for a composite view across a number of real-world entities, such as a power plant or a city, and their related processes.”
curl: (28) Resolving timed out after 5515 milliseconds
If you encounter an error like curl: (28) Resolving timed out after 5515 milliseconds
[user1@hpc-node1 ~]# curl -fsS https://dlang.org/install.sh | bash -s dmd
curl: (28) Resolving timed out after 5515 milliseconds
curl: (28) Resolving timed out after 5512 milliseconds
curl: (28) Resolving timed out after 5514 milliseconds
curl: (28) Resolving timed out after 5513 milliseconds
curl: (28) Resolving timed out after 5514 milliseconds
curl: (28) Resolving timed out after 5514 milliseconds
curl: (28) Resolving timed out after 5515 milliseconds
curl: (28) Resolving timed out after 5514 milliseconds
curl: (28) Resolving timed out after 5515 milliseconds
curl: (28) Resolving timed out after 5515 milliseconds
It is likely a DNS Lookup Resolution Issue. You might want to take a look at /etc/resolv.conf . you may want to change the DNS to another nameserver that resolves faster like one from Google Public DNS IP Addresses
# Generated by NetworkManager
nameserver 192.168.0.1
To another nameserver, maybe like Google Public DNS IP Addresses. You can find more information at https://developers.google.com/speed/public-dns/docs/using
# Generated by NetworkManager
nameserver 8.8.8.8
nameserver 8.8.4.4Stopping and Starting Altair Mistral Services
If you are looking at stopping the Altair Mistral Services
% systemctl stop grafana-server
% systemctl stop kibana.service
% systemctl stop elasticsearch.service
Alternatively, if you wish to start the Altair Mistral Services
systemctl start grafana-server
systemctl start kibana.service
systemctl start elasticsearch.service
