https://docs.open-mpi.org/en/v5.0.x/release-notes/networks.html
Prerequisites 1
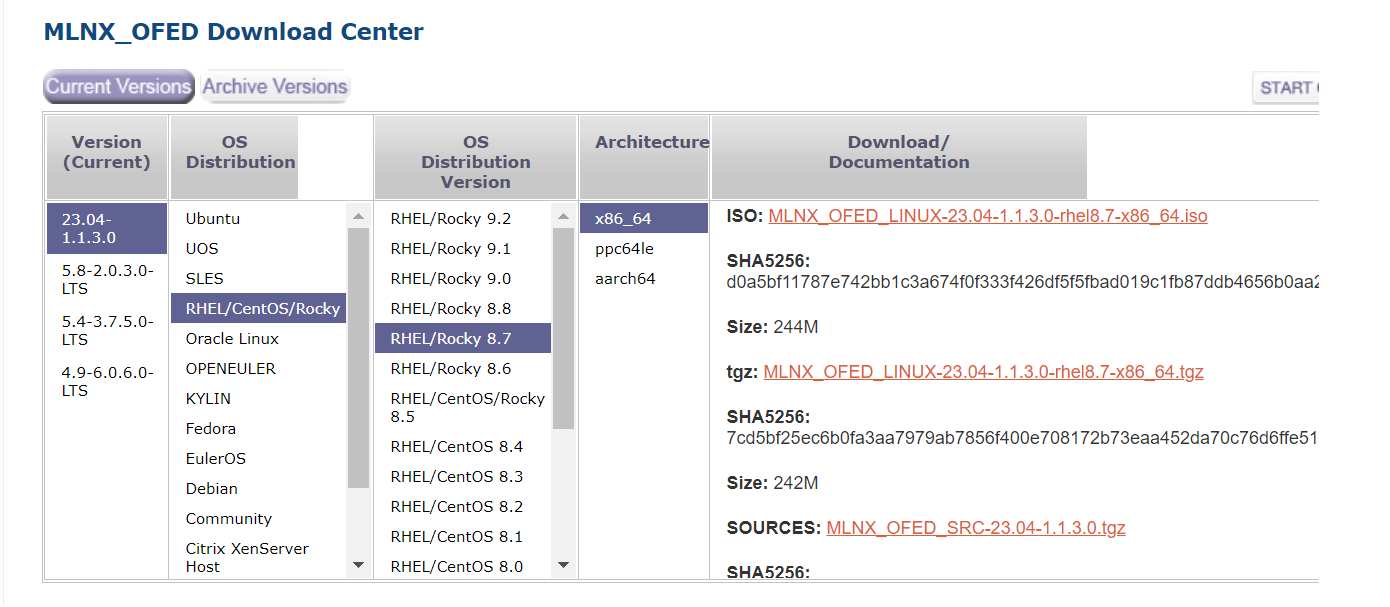
First thing first, You may want to check whether you are using RoCE. Do take a look at Installing RoCE using Mellanox (Nvidia) OFED package
Prerequisites 2
Do check whether you have ucx. You can do a dnf install
# dnf install ucx ucx-develAlternatively, you can do a manual install. For information on how to install, do take a look at http://openucx.org/wp-content/uploads/UCX_install_guide.pdf
# wget https://github.com/openucx/ucx/releases/download/v1.4.0/ucx-1.4.0.tar.gz
$ tar xzf ucx-1.4.0.tar.gz
$ cd ucx-1.4.0
$ ./contrib/configure-release --prefix=/usr/local/ucx-1.4.0
$ make -j8
$ make install
Prerequisites 3
Make sure you have install GNU and GNU-C++. This can be done easily using the
# dnf install gcc-c++ gccStep 1: Download the OpenMPI package
You can go to OpenMPI to download the latest package at (https://www.open-mpi.org/software/ompi/v4.1/). The latest one at the point of writing is OpenMPI-4.1.
Step 2: Compile the Package
$ ./configure --prefix=/usr/local/openmpi-4.1.5 --enable-mpi-cxx --with-devel-headers --with-ucx --with-verbs --with-slurm=no
$ make && make install
Step 3: To run the MPIRUN using ROCE, do the following.
You may want to see Network Support Information on OpenMPI
$ mpirun --np 12 --hostfile path/to/hostfile --mca pml ucx -x -x UCX_NET_DEVICES=mlx5_0:1 ........References: