
Taken from RedHat Portal, I found the Guide very useful.
Red Hat
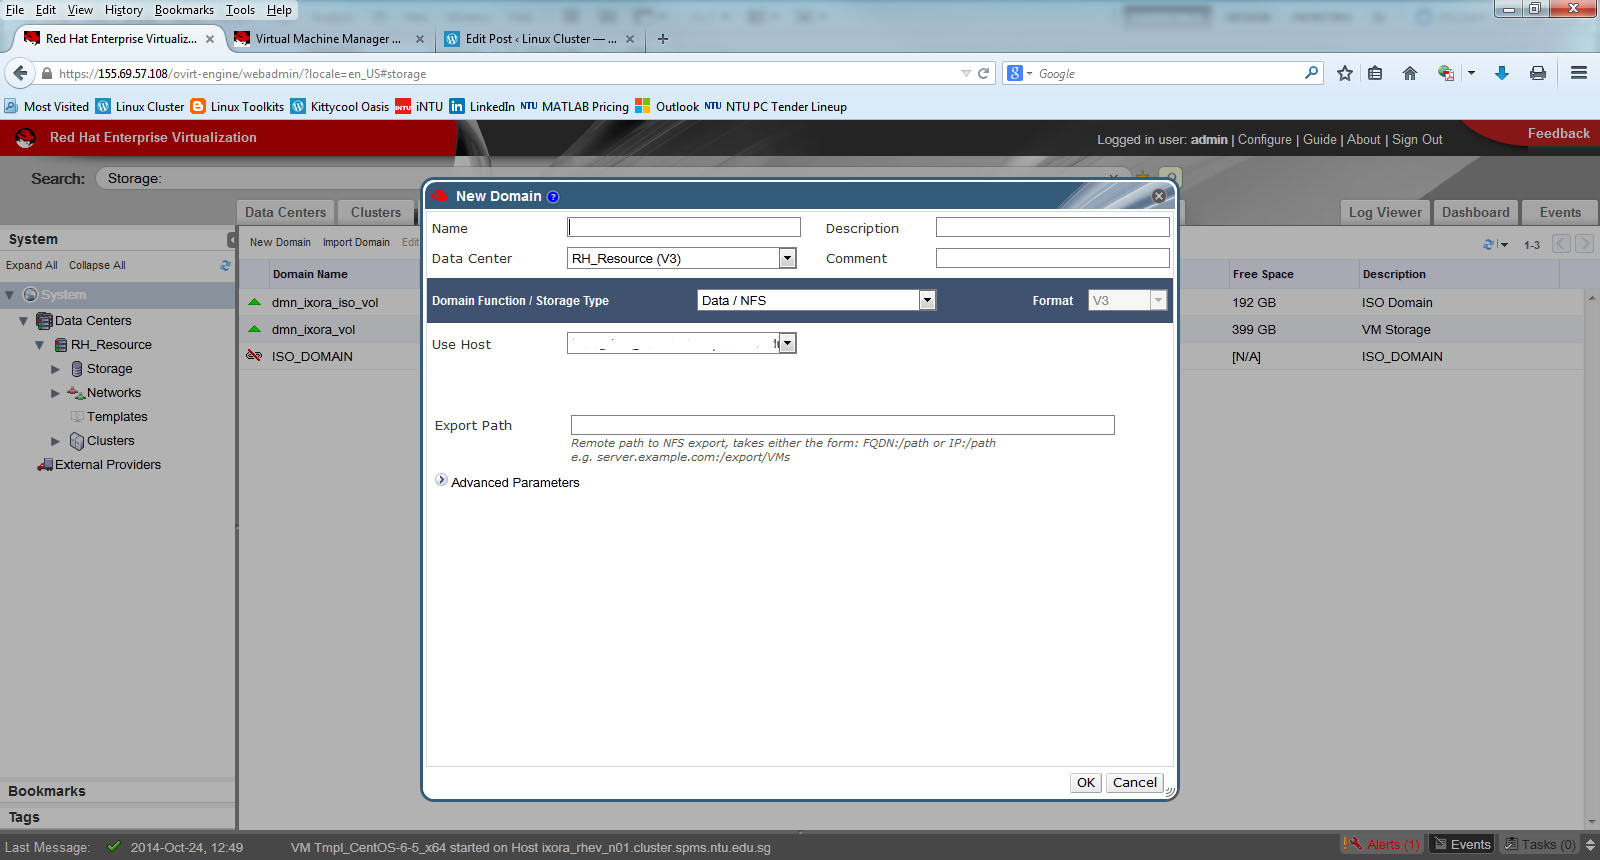
Create and Populate a New ISO NFS Storage Domain for RHEV
For the NFS ISO Domain or NFS Data Domain, do ensure the followings
- Ensure the NFS File System is properly exported
- Ensure the user and group ownership is correct
Step 1: If you are exporting ISO on your NFS File Server. At your /etc/exports
/exports/ISO 192.168.1.0/255.255.255.0 (rw, async)
Export NFS and check mounting
# exportfs -av
# showmount -e
Step 2: Change Permission
The permission on the exported file system must be owned and writable by user vdsm and group kvm
# chown vdsm.kvm /exports/iso
# chmod g+s /exports/iso
Step 3: Check list of available ISO Domains. At RHEM
# rhevm-iso-uploder list
ISO Storage Domain Name   | Datacenter                | ISO Domain Status
dmn_ixora_iso_vol         | RH_Resource               | active
Step 4: Mount the ISO Domain using Red Hat Enterprise Manager (RHEM)
Step 5: Uploading ISO using command line. Upload the ISO files to the directory /…/uique-UUID/images/11111111-1111-1111-1111-111111111111
# cd /iso/f21673a0-376e-4381-8760-b681c824dd1a/images/11111111-1111-1111-1111-111111111111
Copy the linux or windows iso file into the above directory
# scp remote_server:/something-directory/rhel-6.5.iso .
Change Ownership back to vdsm.kvm
# chown vdsm.kvm rhel-6.5.iso
References:
Speeding up kernel crash hang analysis with the kernel log
This is a summaries article taken from RHEL6: Speeding up kernel crash / hang analysis with the kernel log.
When there is a kernel crash or hang, there is often a very large file is produced containing a memory dump of the entire system called a vmcore. Analysis of the kernel crash or hang often requires this large file be uploaded to Red Hat for analysis (if you have subscription)
For RHEL 6.4 and above
Starting with RHEL 6.4, Starting with Red Hat Enterprise Linux 6.4 and kexec-tools-2.0.0-258.el6, the kdump process will dump the kernel log to a file called vmcore-dmesg.txt before creating the vmcore file.
# ls /var/crash/127.0.0.1-2012-11-21-09\:49\:25/
vmcore  vmcore-dmesg.txt
# cp /var/crash/127.0.0.1-2012-11-21-09\:49\:25/vmcore-dmesg.txt /tmp/00123456-vmcore-dmesg.txt
For RHEL 6.0 to RHEL 6.3,
For other versions of Red Hat Enterprise Linux 6, or for cases where vmcore-dmesg.txt is not generated, you can use the following makedumpfile command to obtain the kernel log from an existing vmcore. NOTE: The makedumpfile command is part of the kexec-tools package)
# makedumpfile --dump-dmesg [path-to-vmcore] [kernel-log-file]
# makedumpfile --dump-dmesg /var/crash/127.0.0.1-2013-06-14-16\:26\:07/vmcore /tmp/00123456-vmcore-dmesg.txt
The dmesg log is saved to /tmp/00123456-vmcore-dmesg.txt.
makedumpfile Completed.
NOTE: If the above command fails, it may indicate the vmcore is corrupt to the point of not containing any useful information.
Create export domain or ISO Domain on RHEV 3
This is taken from Red Hat Portal How to create an export domain or iso domain? (Need customer access)
On the NFS, you need to do the following
# mkdir /export/data
# chown -R 36:36 /export/data
# chmod 755 /export/data
# vim /export_data
/export/data *(rw)
# /etc/init.d/nfs restart
# chkconfig nfs on
The key setup is that the ownership must be given vdsm kvm (36:36). Or you will have errors like
“Error while executing action Add Storage Connection: Problem while trying to mount target”
# mkdir /export/ISO
# chown -R 36:36 /export/ISO
# chmod 755 /export/ISO
# vim /export/ISO /export/ISO *(rw)
# /etc/init.d/nfs restart
# chkconfig nfs on
References:
- Red Hat Enterprise Virtualisation and NFS (NetApp Community)
- How to create an export domain or iso domain? (Red Hat Portal – Restricted Access)
Subscribing to Red Hat Virtualisation Manager Channels
Taken from Red Hat Red Hat Enterprise Visualization Documentation
Step 1: Register the system with Subscription Manager
Run the following command and enter your Red Hat Network user name and password to register the system with the Red Hat Network
subscription-manager register
Step 2: Identify Available Entitlement Pools
Entitlement pools containing the channels required to install the Red Hat Enterprise Virtualization Manager
# subscription-manager list --available | grep -A8 "Red Hat Enterprise Linux Server"
# subscription-manager list --available | grep -A8 "Red Hat Enterprise Virtualization"
Step 3: Attach Entitlement Pools to the System
Use the pool identifiers located in the previous step to attach both the Red Hat Enterprise Linux Server and Red Hat Enterprise Virtualization entitlements to the system. Run the following command to attach the entitlements:
# subscription-manager attach --pool=[POOLID]
Step 4: Enable the Required Channels
Run the following commands to enable the channels required to install Red Hat Enterprise Virtualization:
# yum-config-manager --enable rhel-6-server-rpms
# yum-config-manager --enable rhel-6-server-supplementary-rpms
# yum-config-manager --enable rhel-6-server-rhevm-3.4-rpms
# yum-config-manager --enable jb-eap-6-for-rhel-6-server-rpms
Red Hat Enterprise Linux Webinars
![]()
Informative Webinars from Red Hat
- Red Hat Enterprise Linux Virtualization Webinar Series (http://www.redhat.com/webinars/virtualization/)
- Red Hat Cloud Webinar Series (http://www.redhat.com/solutions/cloud/resources/buildingwebinarseries2011/)
- Red Hat Webinar (http://www.redhat.com/webinars/)
